Custom DIY Phone Projector For Your Bed Fort
My DIY Phone Projector
I was looking for an inexpensive projector to recommend using inside the Bed Forts when I came across one made out of cardboard. This made my wheels turn. I thought this would be a great project to teach kids about optics and add to the awesomeness of their Bed Fort. After ordering a few parts, I started experimenting and came up with the design that follows.
Notes:
- The dimensions for the projector are based on a 3″ 6x magnification lens. If you use a different lens, make sure you experiment with a cardboard box to determine if you need to make the wooden box longer in order to focus properly. The larger the lens, the brighter the image. More magnification means the phone can be closer to the lens making the box smaller.
- I designed this projector to work with my iPhone 4. But it should fit any phone less than 5-1/2″ tall (including an iPhone 5 without the charger attached). It would be fairly easy to widen the design for a larger phone (or maybe even an iPad :-))
- Don’t expect Spielberg to want to screen movies with this projector. The image is not very bright and not super clear… But it is fun and kids love the magical feel of projecting a movie screen from a phone!
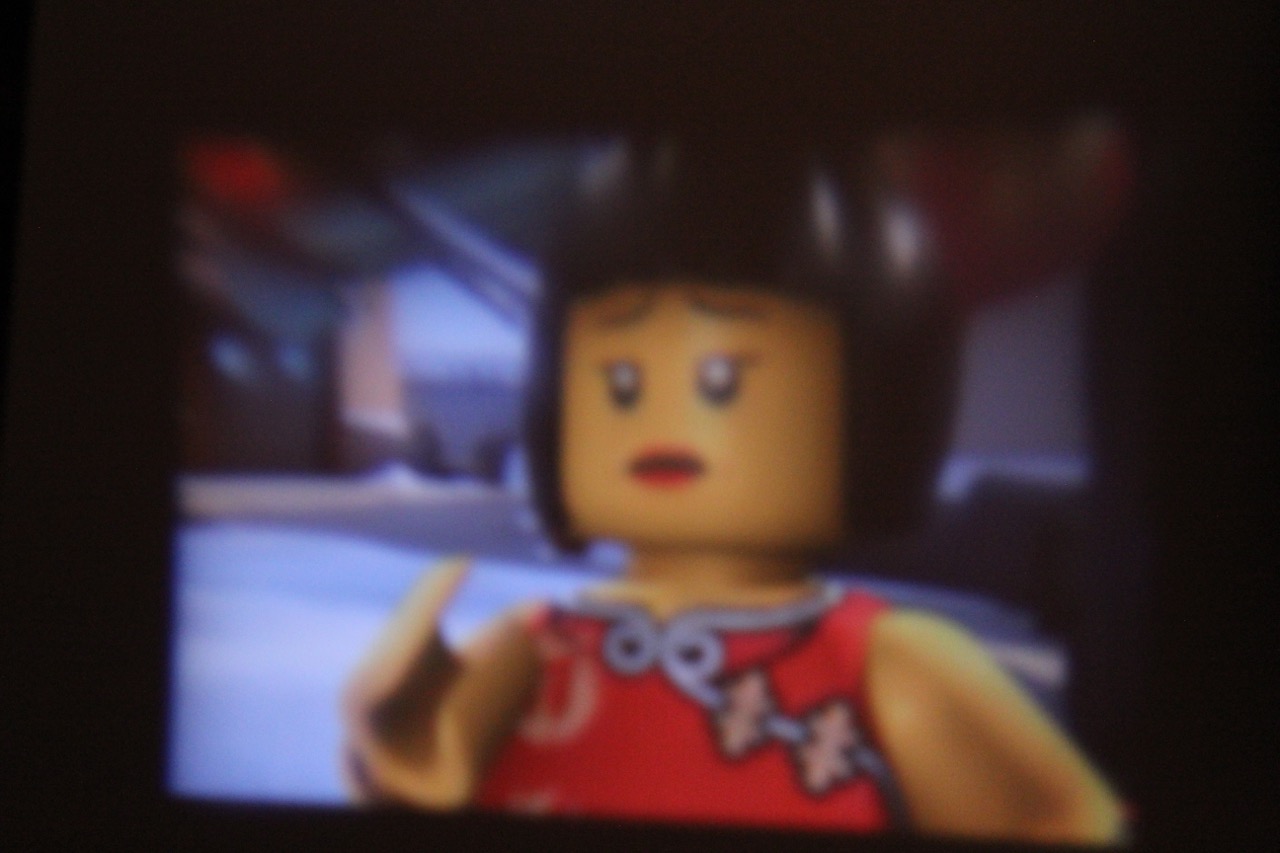
Lego Ninjago on the “big” screen of the DIY Phone Projector.
Tools:
- Drill Press
- Hand Drill
- Hack Saw
- Preferred saw for cutting the wood
- Drill Bits – 1/16″ – 1/8″ – 7/32″ – 3/8″ and 1/2″
- Hole Saw – 3″ (if you use the magnifier I used)
- File for smoothing the drilled mending plate and for smoothing the cut adjustment rod
- Flat head screwdriver for pushing in the brads
- Sheet of sandpaper (80 to 120 grit should work)
- Screwdriver for the wood screws
Materials:
- 1 – 3″ 6x magnifying glass (I bought this 3 pack from Amazon because it was pretty cheap and the metal housing is easy to remove. You can also use the different sizes and magnification levels to run experiments and show your kids how the lenses change the projected image)
- 1 – 1″x8″ four feet long
- 1 – 10″ to 12″ long 10-24 threaded rod (available at Lowe’s near the metal stock)
- 3 – 10-24 nuts (10-24 means it’s a number 10 diameter with 24 threads per inch. Don’t accidentally get 10-32 nuts)
- 2 – #10 flat washers
- 1 – 5″x3″ mending plate (Available at Lowe’s near the construction braces and gate hardware)
- 1 – Decorative handle of your choice. You might want to see if the threaded rod will fit the one you choose. If it doesn’t fit, you may need to buy a 10-24 tap from the tool department.
- 16 – 1-5/8″ Wood Screws
- Small Brad Nails
- 2 – 1″x3/4″ Hinges
- Tacky Putty – The kind you use to hold up posters
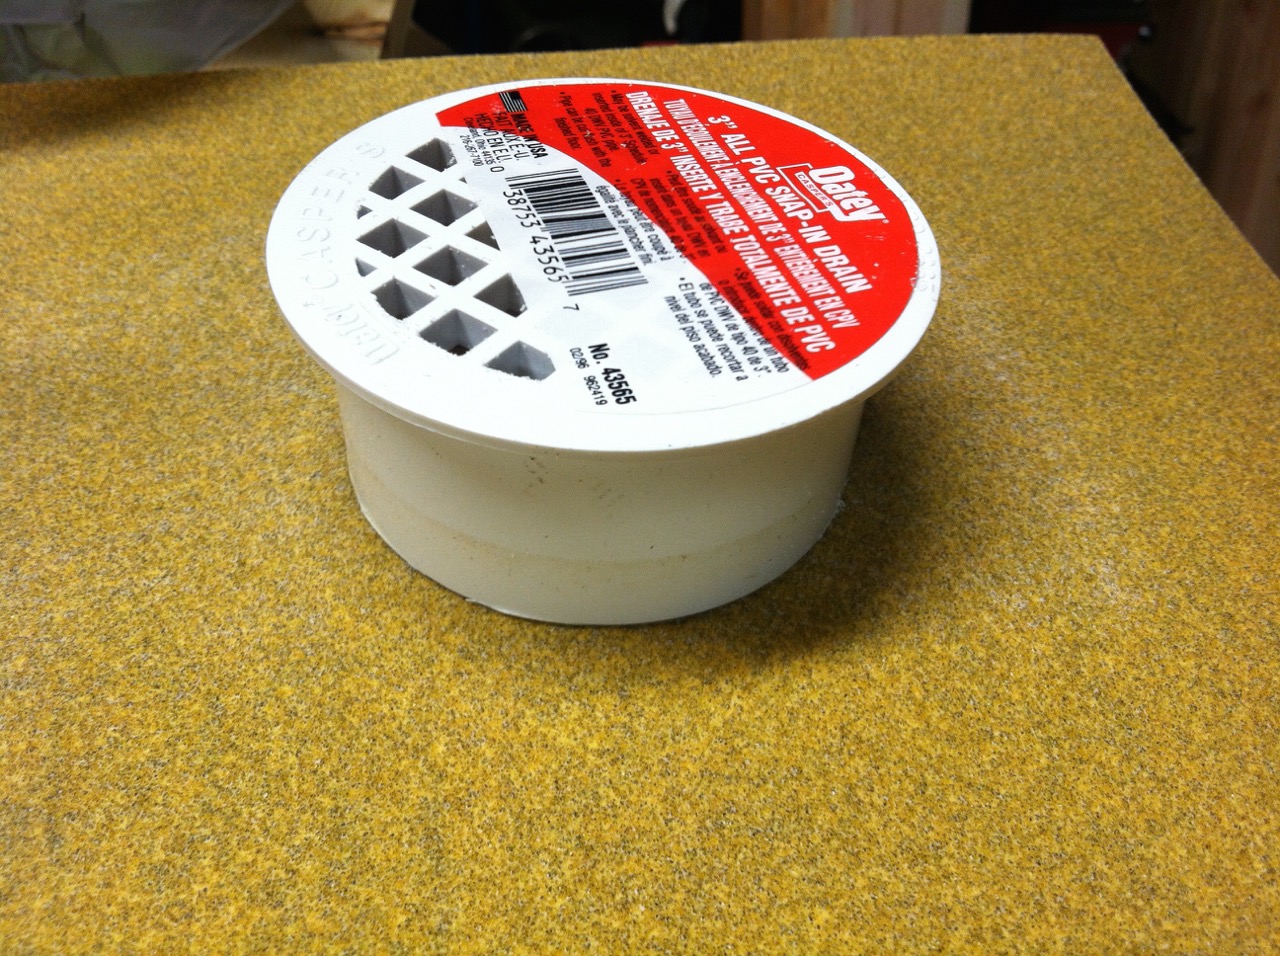
- 1 – 3″ OUTSIDE diameter pipe fitting. this is a tough one… Measure the available fittings to find one that is 3″ on the outside. This snap in drain is the one I ended up going with. A 3″ “insert coupling” would also work if you can find one.

This was the only fitting I could find that was 3″ on the outside.
Cut Dimensions:
Here is the cutting guide utilizing one 4′ long 1×8. Make sure you measure before each cut since the previous cut will take out around 1/8″ because of the width of the blade. In other words, don’t draw all the lines at once and cut without taking the width of the blade into consideration.

Cut dimensions to make a phone projector from a 4′ long 1×8
Drill Dimensions:
Use a 3″ hole saw and a 7/32″ drill bit to make the holes in the front faceplate. You’ll want to utilize a drill press for the 3″ hole. Use a 1/2″ bit to make holes for the audio to come out. Since phones are so quiet anyway, you may want to interface with external speakers instead.

Drill dimensions for the DIY phone projector
Assembly:
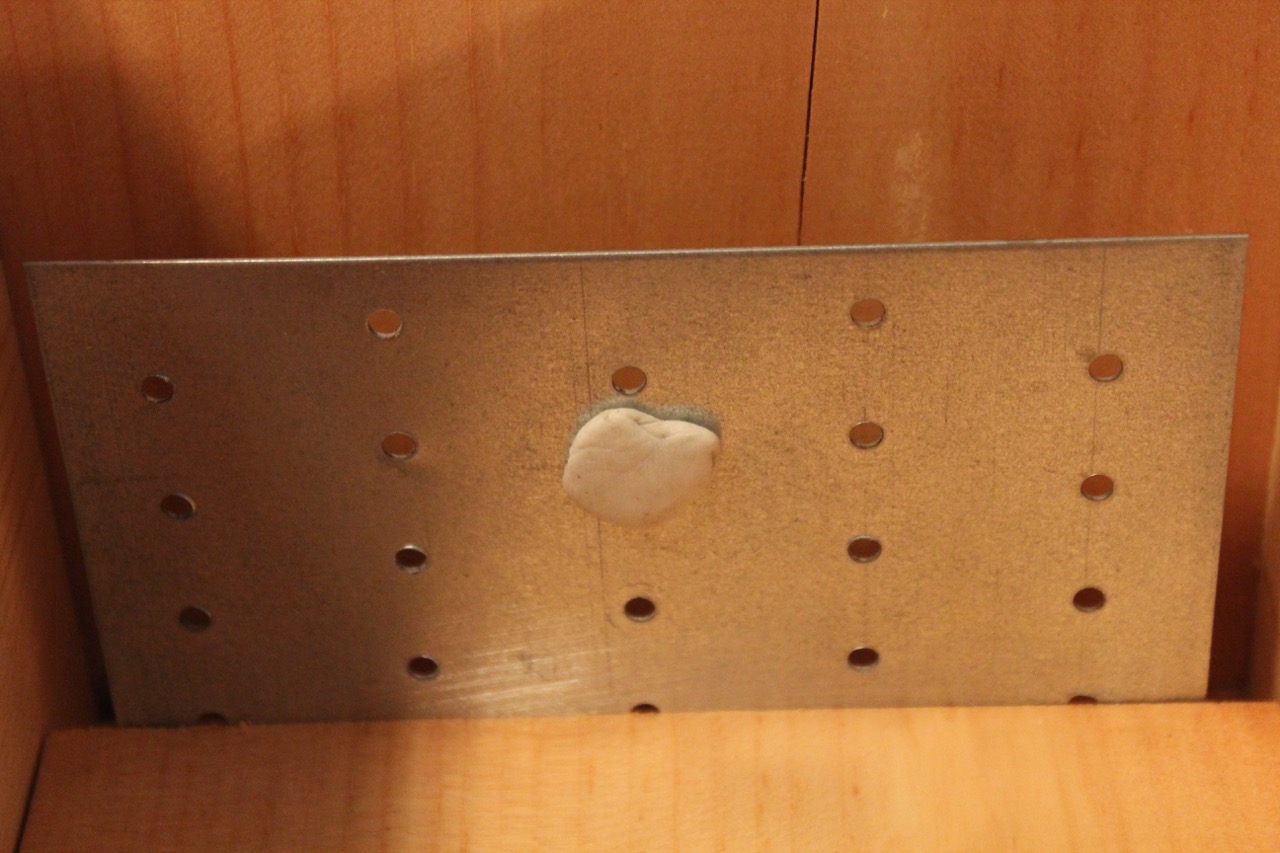
Mount the 5″x3″ mending brace to the back of the 2-5/16″ x 5-5/8″ phone holder by marking the holes and pre-drilling the wood with a 1/8″ bit. If you don’t pre-drill the holes, it’ll probably split. Drill through the metal plate, between the two screws, with the 7/32″ bit used earlier so the adjustment rod can travel through the plate (Note my inability to drill in the center…) You can drill from the side with the wood to make it easier. Be sure to clamp the metal plate so it can’t get caught by the bit and cut your hand by spinning. File any sharp parts of the plate smooth.
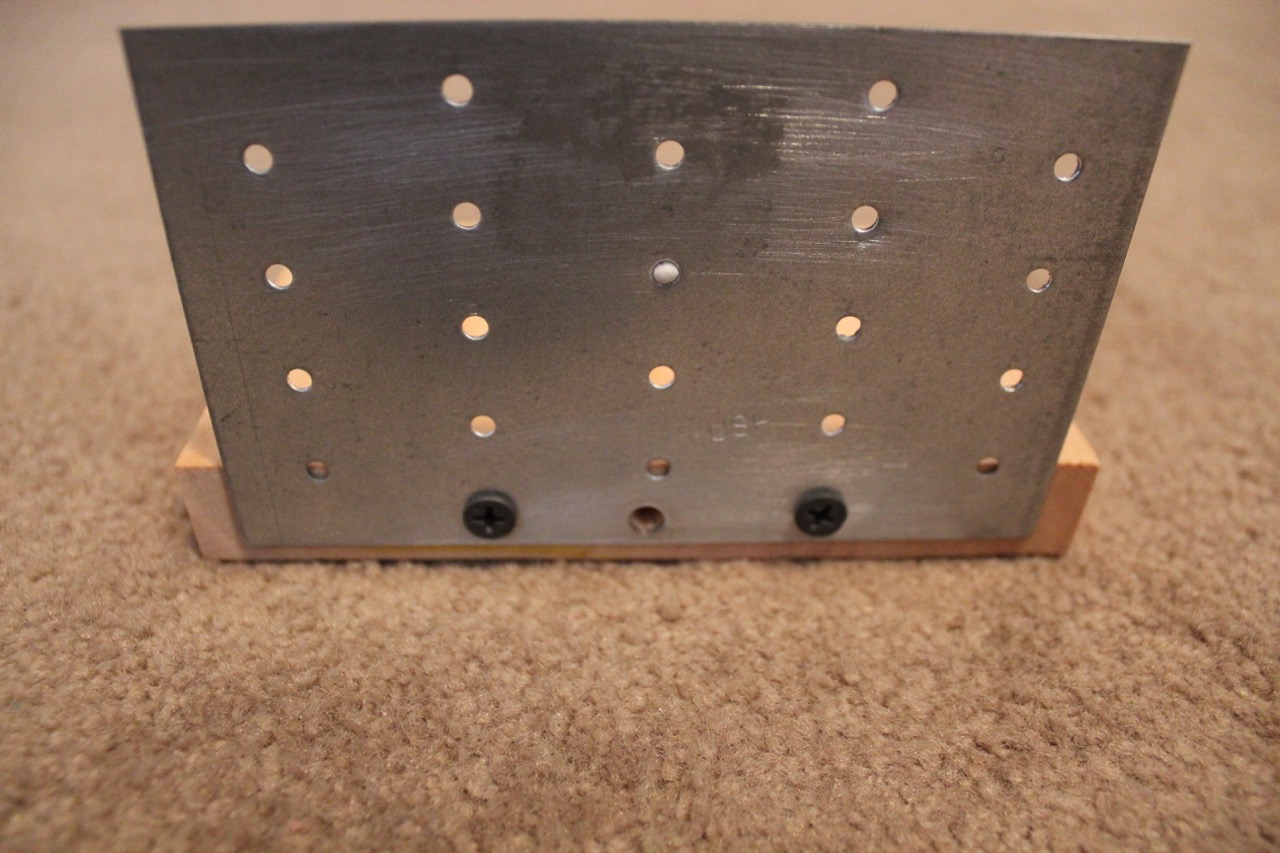
You’ll need to drill a clearance hole for the adjustment rod to go through.
On the front of the phone holder, you’ll want to drill the 7/32″ hole larger to allow an adjustment nut to be pressed inside. Use a 3/8″ drill bit and only drill around 1/2″ deep. Thread a nut onto the end of the threaded rod and press it into the phone holder until it bottoms out around 1/2″ in and unscrew the rod.

Press a nut into the 3/8″ hole
Configure the front, bottom and side pieces as shown below placing the audio holes near the back. Clamp the pieces together, pre-drill with a 1/8″ bit and fasten together with wood screws (2 per board should do).

DIY Phone Projector Assembly Drawing
Configure the back panel as shown. Clamp the pieces together, pre-drill with a 1/8″ bit and fasten together with wood screws. I’d use 2 screws on each side and 2 on the bottom.

Attach the back panel for the DIY Phone Projector
Place the top of the projector on as shown below. Center the board, mark the holes for the hinges and pre-drill with a 1/16″ bit. Screw the hinges on and make sure the lid opens as desired.

Place the hinges for the DIY Projector
Thread the 10-24 all-thread rod into the knob you have chosen. The knob I picked was a slightly different thread and I was able to forcibly cross thread it on (which is normally a bad thing but in this case it works well because you don’t want the knob to spin). Depending on the knob you choose, you may need to use a 10-24 tap to re-thread the knob. You may also need to apply Loctite threadlocker to make sure the knob doesn’t loosen when you spin it. The knob I chose also had a little spike to keep it from spinning. If yours has one, rip that sucker out with some pliers.

Thread the knob onto the all-thread rod.
Slide the rod into the projector and note how much needs to be removed in order for the knob to touch the front of the projector while the rod stays 1/2″ or so from the back of the projector. Place a nut or two on the all-thread and cut off the appropriate amount of all-thread. After cutting the all-thread, file any rough spots and remove the nuts to make sure the threads are ok.
Configure the phone holder, two nuts, two washers and the threaded rod as shown. Thread the end of the adjustment rod into the nut pressed inside of the phone holder.
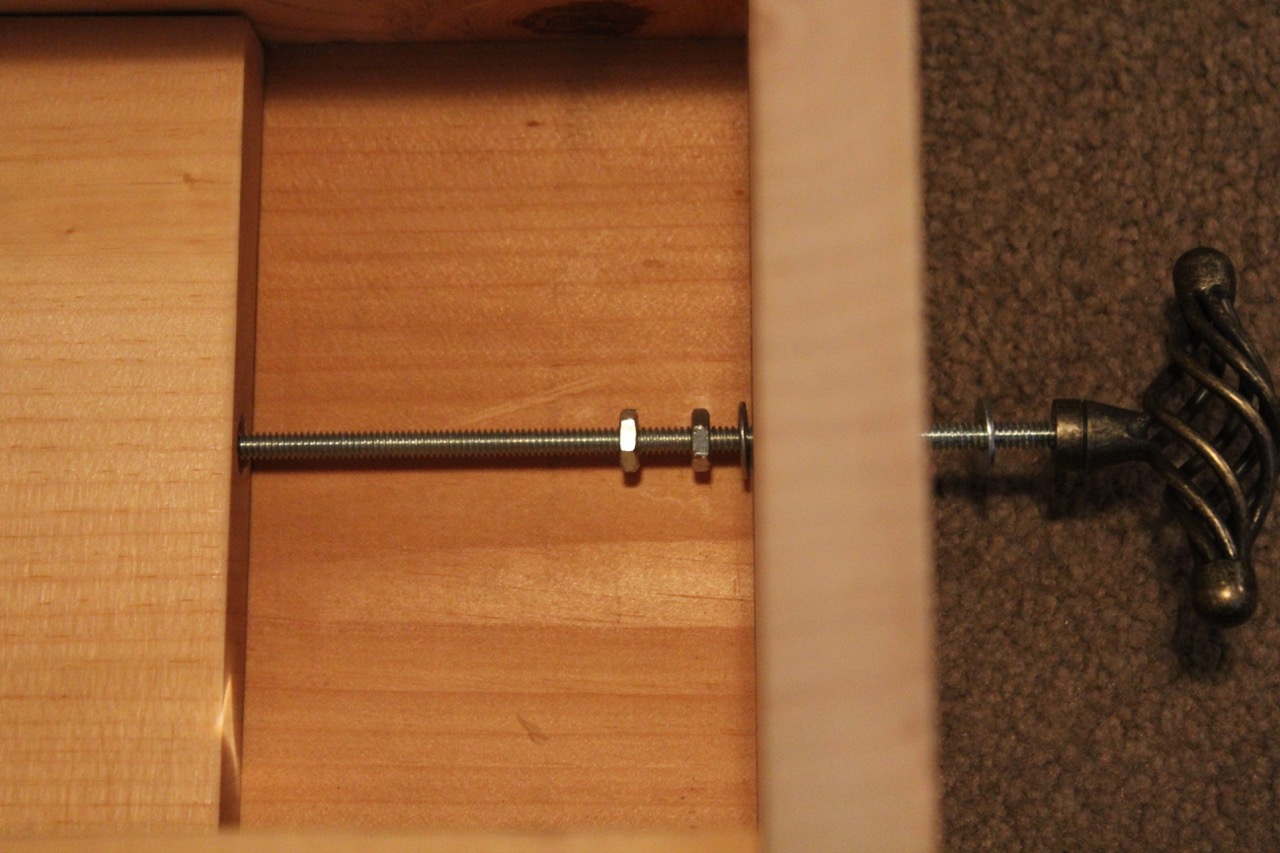
Insert the adjustment rod like so… with two nuts and two washers as shown.
Use a few washers and a pencil to make a uniform 1/4″ high mark around the 3″ PVC fitting while you spin it. I’m not going to lie… the next part is a little tough. Hold the PVC fitting in a vice and use a hack saw to cut along the line. It is easier to cut through one portion and then rotate the fitting to cut the next bit than trying to cut through the whole thing at once.
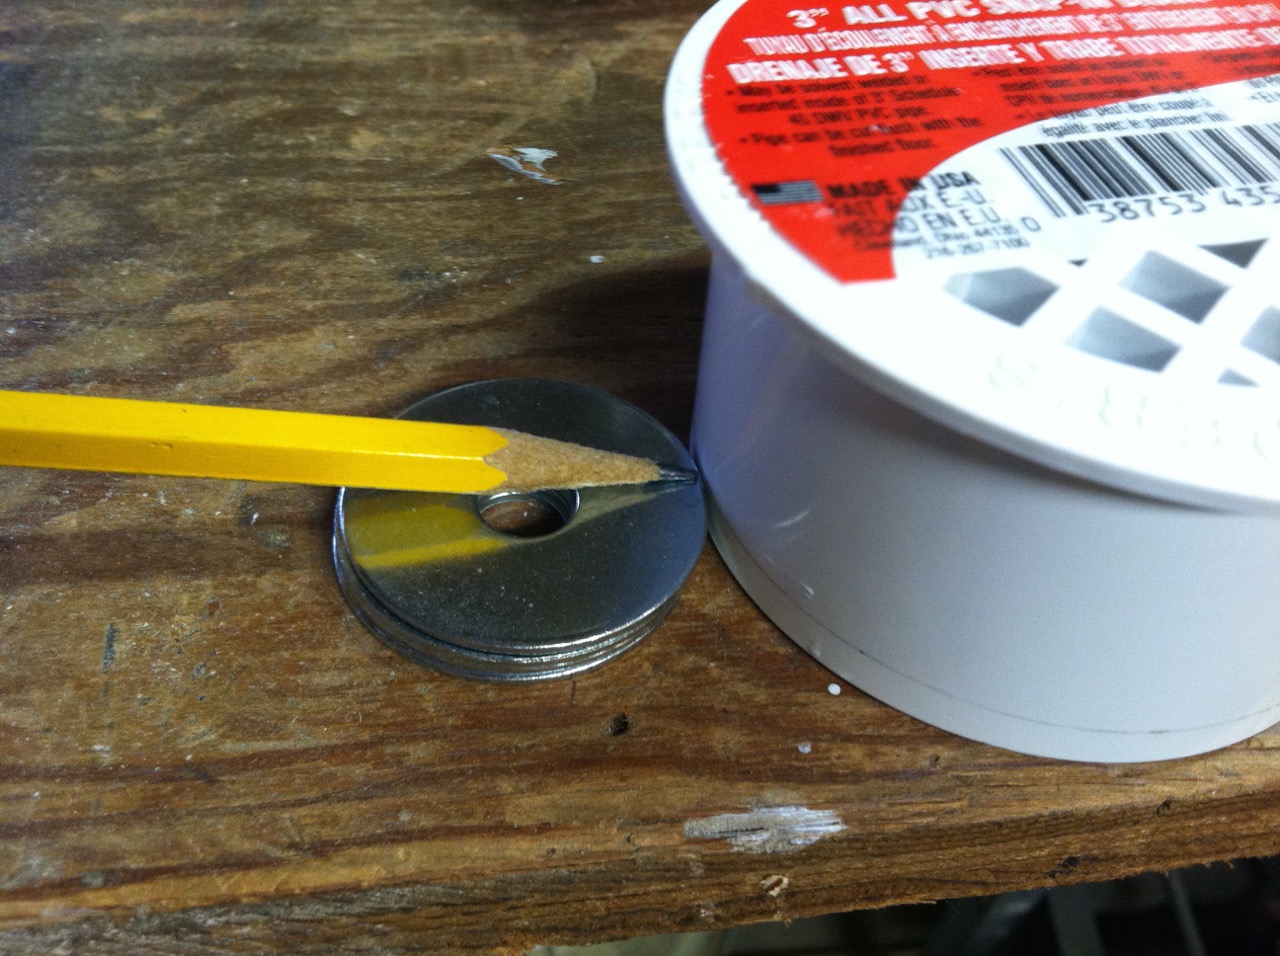
Mark around the fitting so you can cut it.
After cutting the ring off, place it on a sheet of sandpaper and move it around to smooth the edge you just cut.
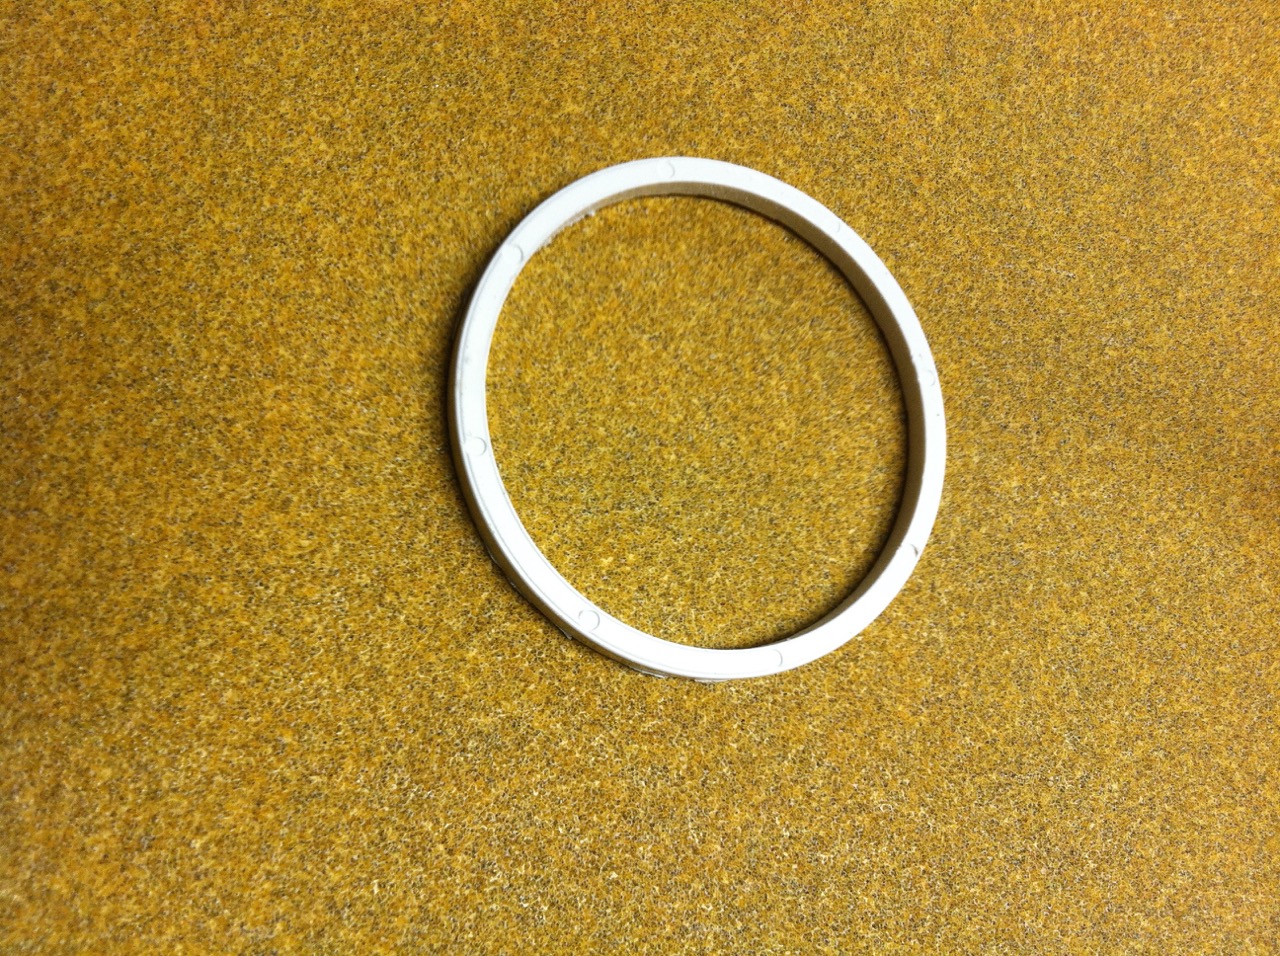
Move the ring around on a sheet of sandpaper to remove rough edges and make it more uniform.
Take the remaining part of the fitting and do the same thing to make it more uniform before cutting the second ring. Cut the second ring like the first one and sand it too.
Smooth the fitting before repeating the process for the second ring.
Drill four evenly spaced 1/16″ holes in both of the rings. Pick the prettiest ring to go on the outside. Use the brads to secure the front ring flush with the front of the board. You should be able to push the brads in using a flat head screwdriver. Be sure to push them in at an angle away from the front of the board to minimize the chance of splitting the face of the board.
Mount the first ring flush with the front of the projector.
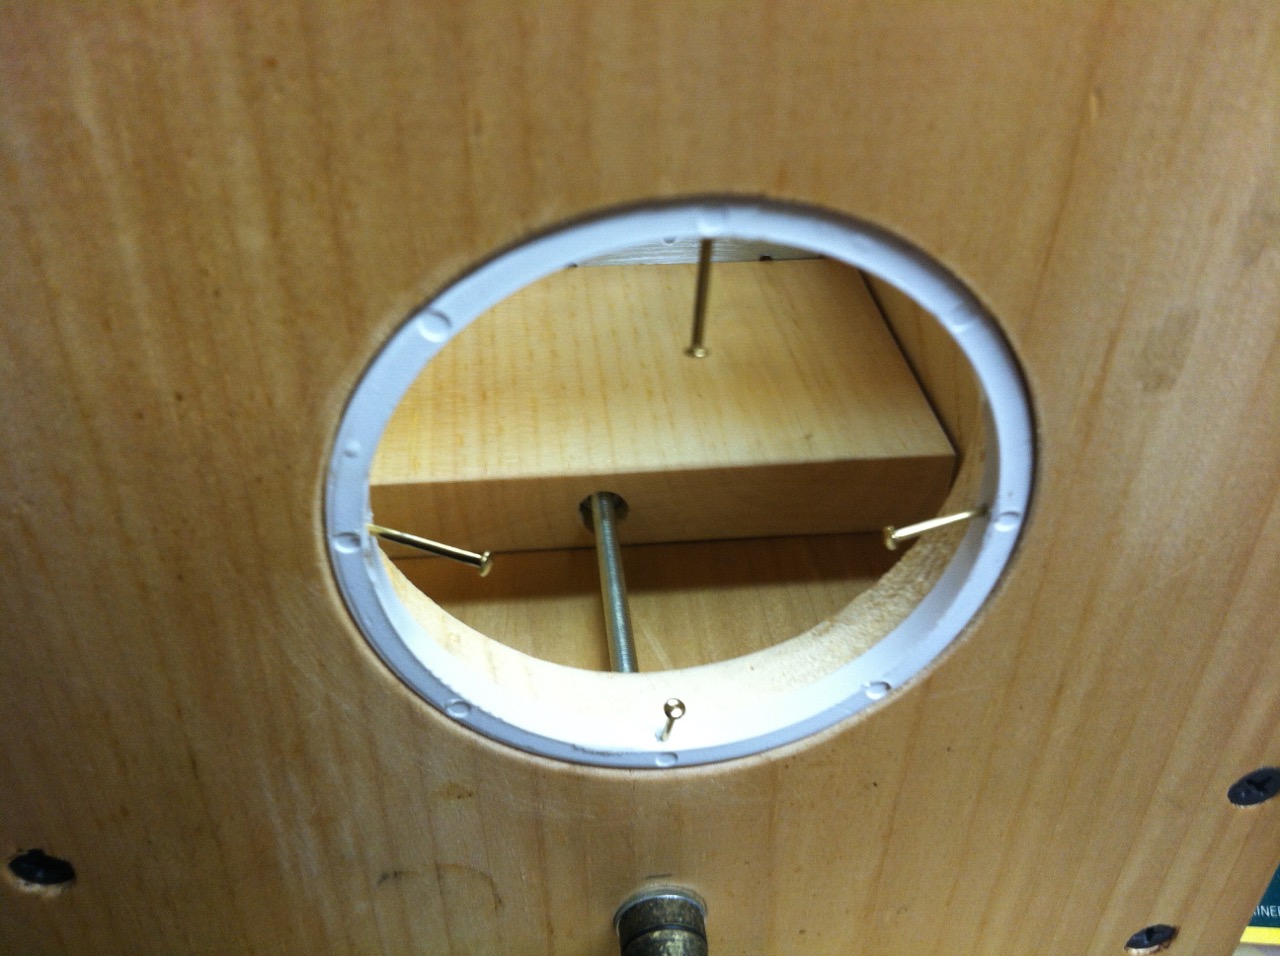
Remove the 3″ magnifying lens from its handle and place it behind the installed ring. Be careful because they like to fall and chip. Twist the second ring 90 degrees from the first one so the brads won’t hit the first brads when you push them in. Use a flat head screwdriver to push the brads in being careful to not scratch the lens.
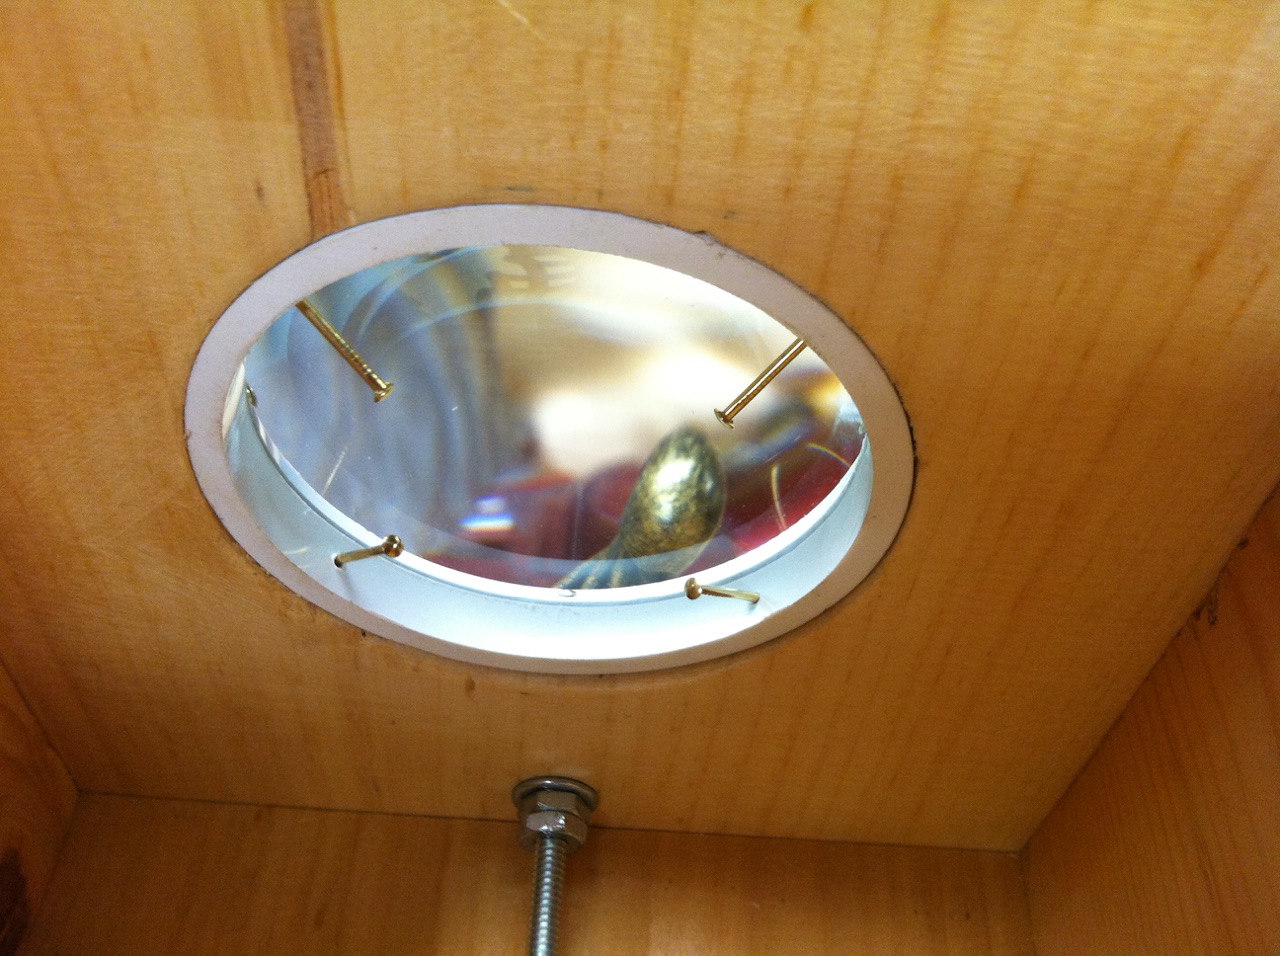
Install the lens and mount the second ring.
Thread the adjustment rod nuts all the way to the front of the projector. Use needle nosed pliers to hold the one closest to the board while tightening the other one. Make sure there’s a little gap between the nuts and the washer so the knob will spin freely.
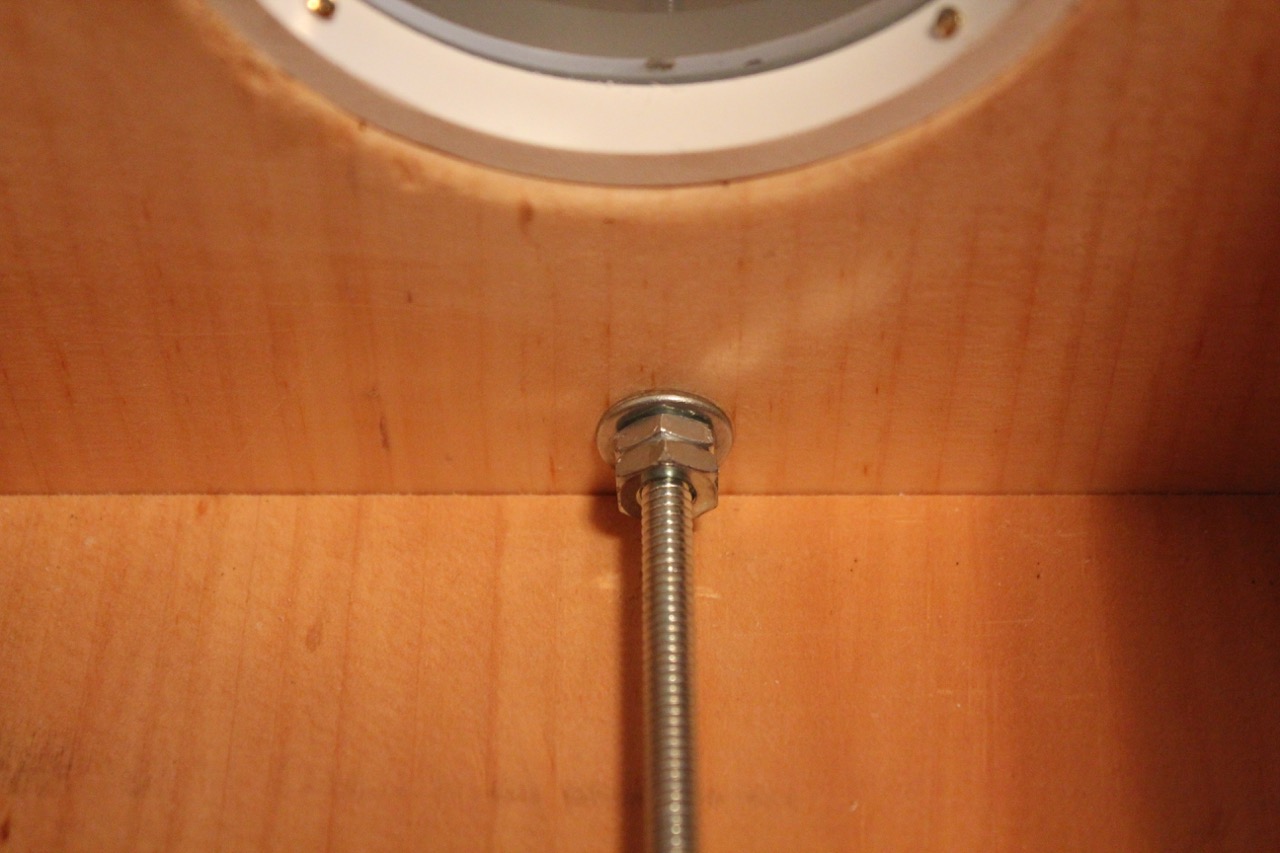
Tighten the adjustment rod nuts.
Add a little tacky putty to the back of the phone holder to keep the phone standing straight up.
Use tacky putty as a simple way to hold the phone straight up.
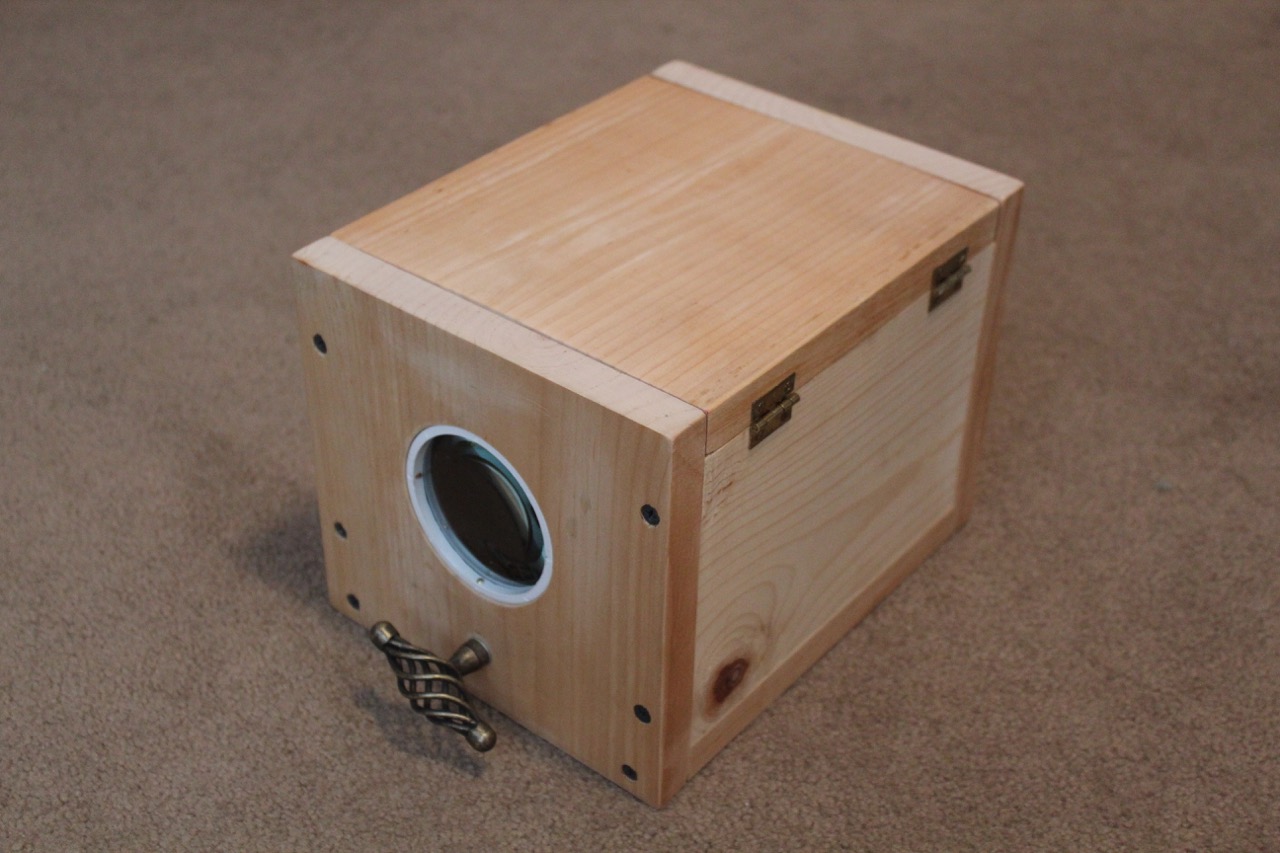
And you’re finished! Here’s what mine looked like before staining and applying polyurethane to it. (I didn’t include audio holes in mine because I’m planning to plug in external speakers anyway)
My DIY Phone Projector
The projector should project a diagonal image about 24″ across from around 4′ away and a larger image from farther away. Here’s my attempt to take a photo of the projected image.
Lego Ninjago on the “big” screen from the DIY Phone Projector.
Tips:
- To keep the projected image from being upside down, you’ll need to set your “screen lock” on the phone so it won’t auto flip with gravity (upper right corner in the image below). Also be sure to turn up the brightness (the upper slider in the image).
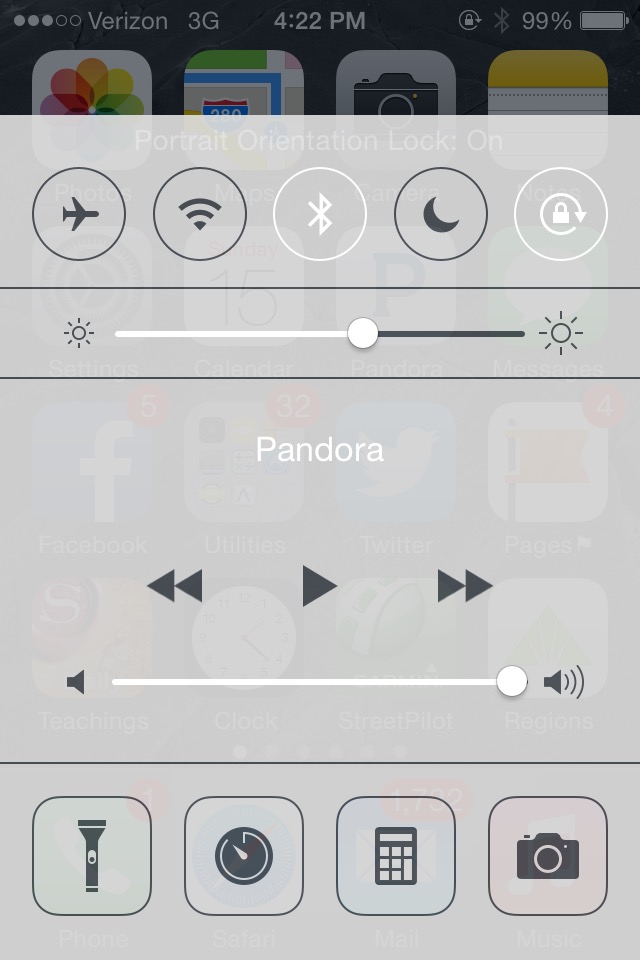
Use the iPhone setting screen to lock the orientation and turn up the brightness. To get to this screen, you just swipe up from pretty much anywhere.
- The projected image is pretty dim so you’ll want the room to be as dark as possible.
- Projecting onto white poster board helps brighten up the image.
- If you’d like to mount the projector to the inside of the Bed Fort, these flush mount hangers look pretty good (I found then in Lowe’s near the picture hanging hardware).
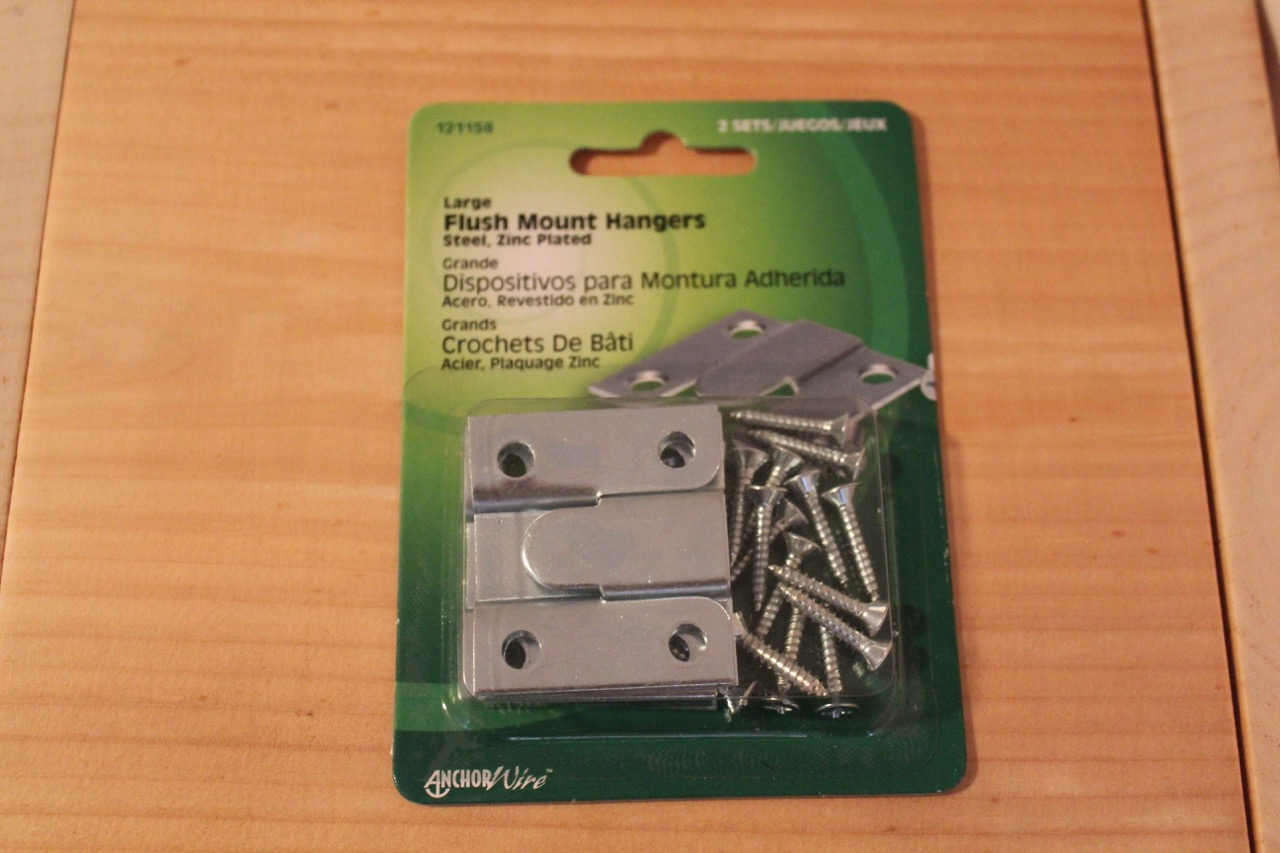
Mounting brackets for attaching your phone projector to the inside of your Bed Fort.
I hope you found this interesting and let me know if you have any recommended improvements.
Thanks!
Andy